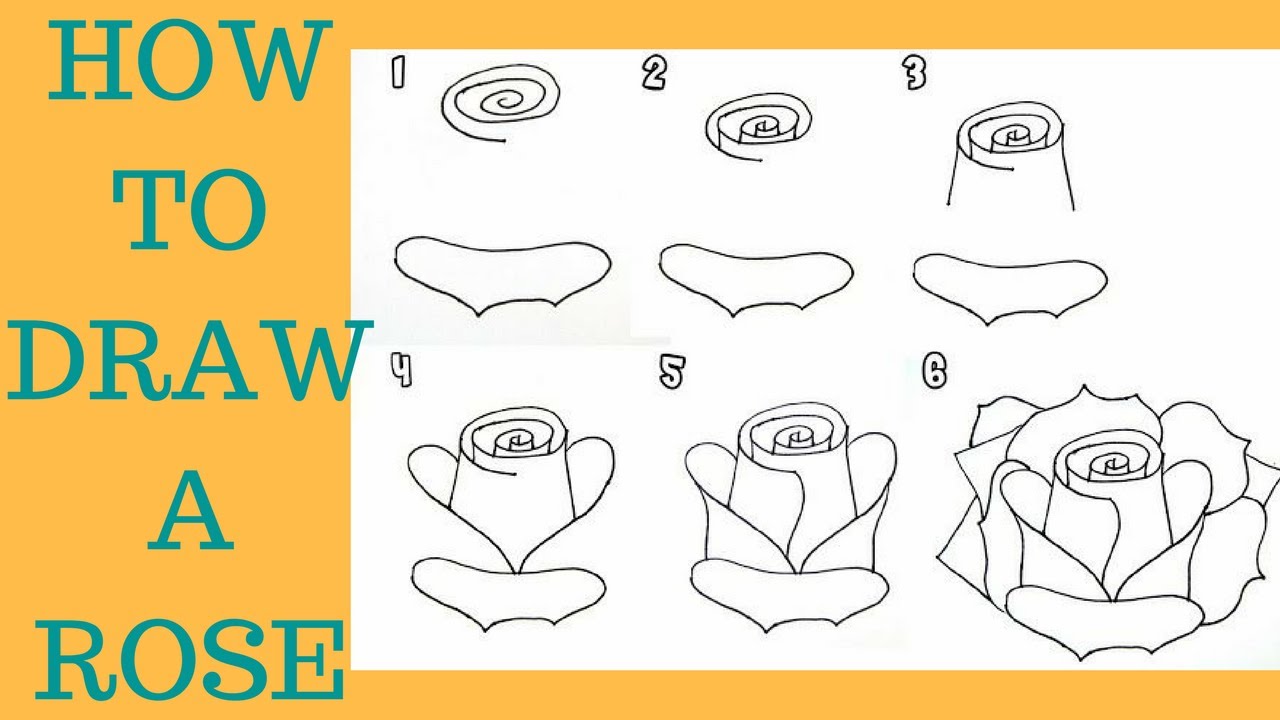
How To Draw Rose Step By Step. 5 finding the shapes of the rose for drawing. To draw a rose, start by sketching a small oval.
Rose Drawing Steps Beginners at from paintingvalley.com
It does not have to be perfect, as nothing in nature is. How to draw a rose step by step for beginners.i made this simple tutorial of how to draw a rose, just follow the step by step video or the images below (10 easy steps). Feel free to repin the ones you like for easy reference and remember to.
Finish Off This Step By Sketching A Light Dash On The Left Petal.
Draw the one on the left first with an end touching the second petal you drew and the other end touching the centre of the rose. Start with the outline of rose. But today we will try to tell you how to draw a rose in a realistic style.
Then, Draw A U Shape, Which Should Look A Bit Like A Cup, Underneath The Oval.
Feel free to color your rose drawing if you want a pop of color. Finally, draw some leaves around the rose. Try not to press too hard with your pencil, as this is just a guideline to help us draw our rose.
We Will Try To Make This Lesson Suitable For Artists Of All Skill Levels.
Notice how the edges are serrated. For this reason, our basic shape to build off of is similar to the shape we drew for our rose bud drawing. 8 how to draw a rose in completion.
Simply Draw In Three Lines That Will Add So Much Detail To The Rose.
How to draw a rose for beginners step by step. Now you are well prepared to draw four different styles of easy rose drawings. You can add extra leaves if you want.
Remember, We Always Want To Use Basic Shapes To Draw Whenever We Can.
This shape helps to plan the layout of the page. Draw out the base of the rose. To draw a rose, start by sketching a small oval.